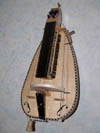
- I met Kurt Reichmann last Weekend in his workshop in Frankfurt. My friend decided to buy one instead of wait for me! ( I can't blame him ) I showed Mr Reichmann my Gurdy, because I had always had a strange "Wah Wah" sound from the Low C and G drones. He told me to drill out the middle Rib which the shaft just clears and my problems would be gone. I did, and they are!! Thanks very much!!
- I have now been able to produce a Guest Book. I would realy be interested in Any comments you would like to make!
Guest Book
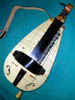
- Here is a lesser detailed documentation of my second Hurdy Gurdy
Number Two
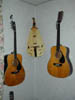
- Here is a documentation of my Ukulele build

Ukulele
THANKS TO:-
-My wife and Kids for putting up with the noise, dirt and my enthusiasm in a project that none of them really found interesting at all!
-Dudelsackbau Kappel & Koch for their support and the use of their Workshop and the Book which caused me to build the instrument in the first place.
- Paul Medhurst for many helpful tips and hints.
- Mum & Dad for finding all of my spelling mistakes ( I hope!! )
- reference Books I used:
Bau Einer Drehleier by Helmut Gotschy ISBN 3-927240-50-8
Die Drehleier Grundlagen fuer Spiel und Wartung by Kurt Reichmann ISBN 3-88977-700-7
The Hurdy Gurdy - Adjustment and Maintenance by Philippe Destrem & Volker Heidemann Verlag Der Spielleute ISBN 3-927240-15-x
If you are looking for suppliers of the raw materials, Here are those which I used

Sound sample "The weary Cutters"

Sound sample "The Wee weaver"
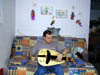
This is a short Video showing how No. 2 is now playing
I bought the drawing from the German National Museum in Nuernburg (Plan MINe 52)

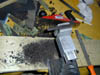
I tried for weeks to get Maple in different thicknesses. I eventually decided to buy a 2.5 meter long block
and cut the required pieces out!! ( I could build another four from the rest)


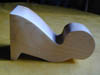
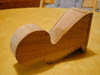
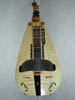
The head carved out of a masive block of maple proved to be quite a task

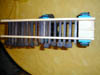
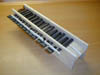
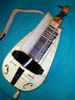
I bought two ebony guitar fret boards to make the keys. They were too thick for the job
and I made the mistake of reducing the thickness of each individual peg (what a waste of time)
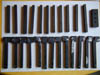
It took a long time to saw and file each individual hole according to the size of the corresponding peg...
but when it was done, I felt like I had made an enormous step!


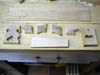
After finishing the body it was time to start working on the details
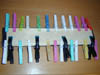
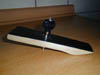
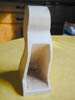
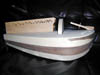
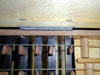
The ribs which support the lid were made from pine


After I had positioned the Ribs I was able to produce a drawing for the turned parts

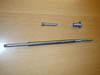

The Diary of building the Body got so long, that I decided to make it a page on its own!


Fitting the Lid to the body was a task which filled me with fear!! My main worry was that the
butt joint would break whilst bending the radius into lid.

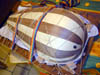
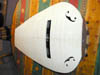

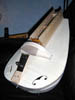
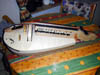
Once the lid was in place, I was able to stick all of the small parts that I had
made over the last few months onto it. It almost looks like a Hurdy Gurdy now...

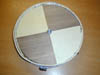
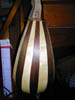
I sanded the body down to grade 400 paper which made the wood feel like a babys...
....Then I oiled the baby!


I guess you could call this section "finishing off"!


So it's just before Easter 2002 and I have finished building the Hurdy Gurdy

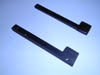
The Steel crank started to rust, so there were no more excuses! I had to make the Brass Crank (September 2003)